For BRC1H
In order to synchronize the Auto operation mode between the Daikin Residential Controller app and the Sky Air wired remote controller, do the following:
- Install and connect the BRC1H remote controller to the Sky Air indoor unit. For installations using BRC1E, see the "How can I synchronize the BRC1E Auto operation mode between the Daikin Residential Controller app and a Sky Air unit?" FAQ item.
- Set the setpoint logic to "Indoor unit" in the Madoka Assistant app.
Changing the setpoint logic using the Madoka Assistant app
1. Open the latest version of the Madoka Assistant app.
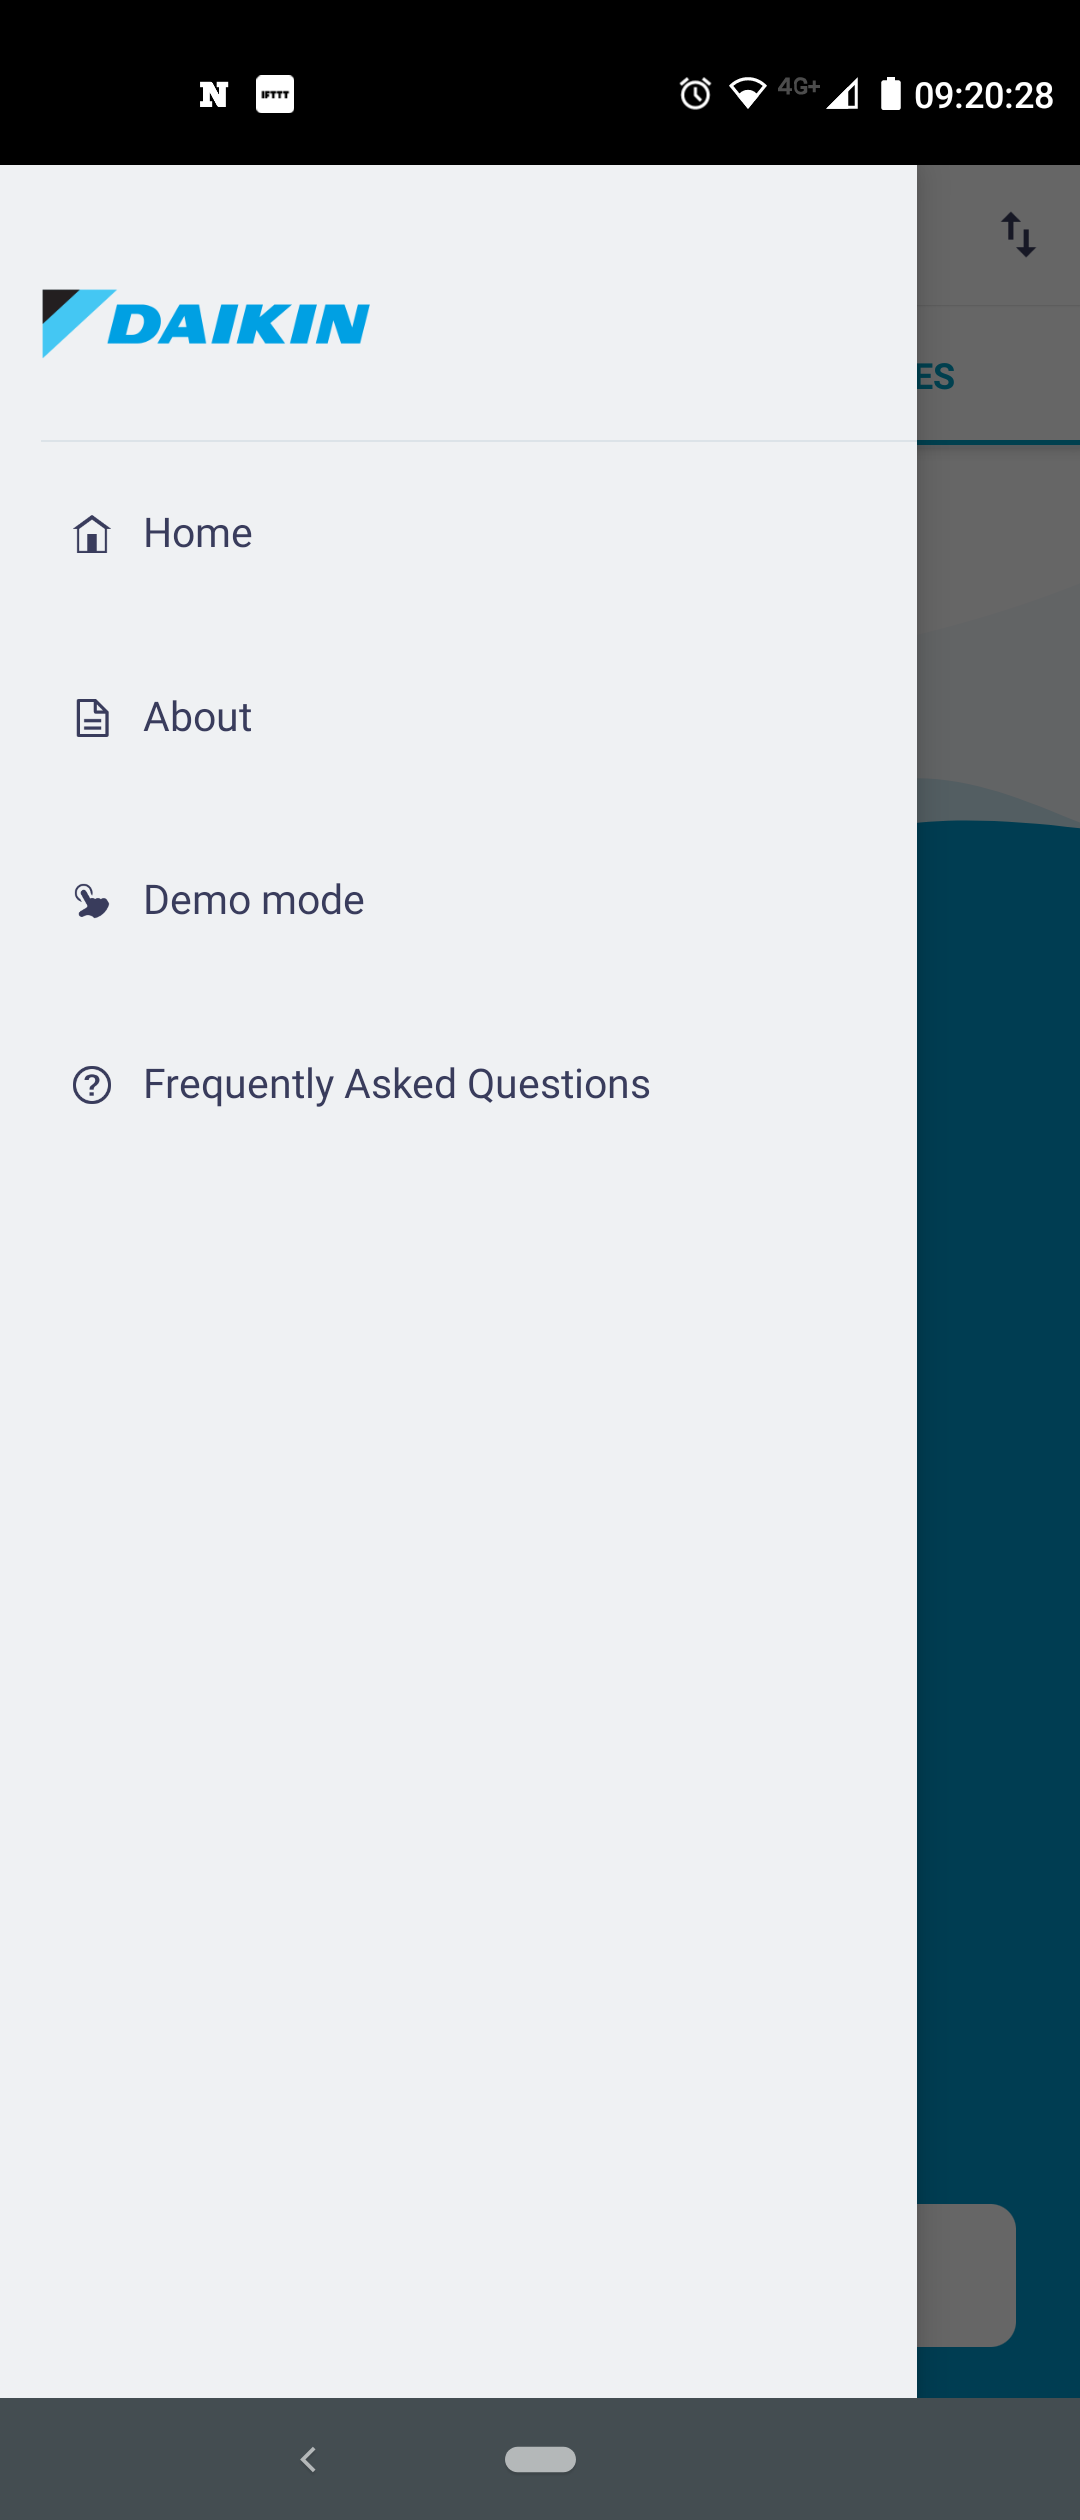
2. Enable Advanced Settings:
1. Go to the main menu.
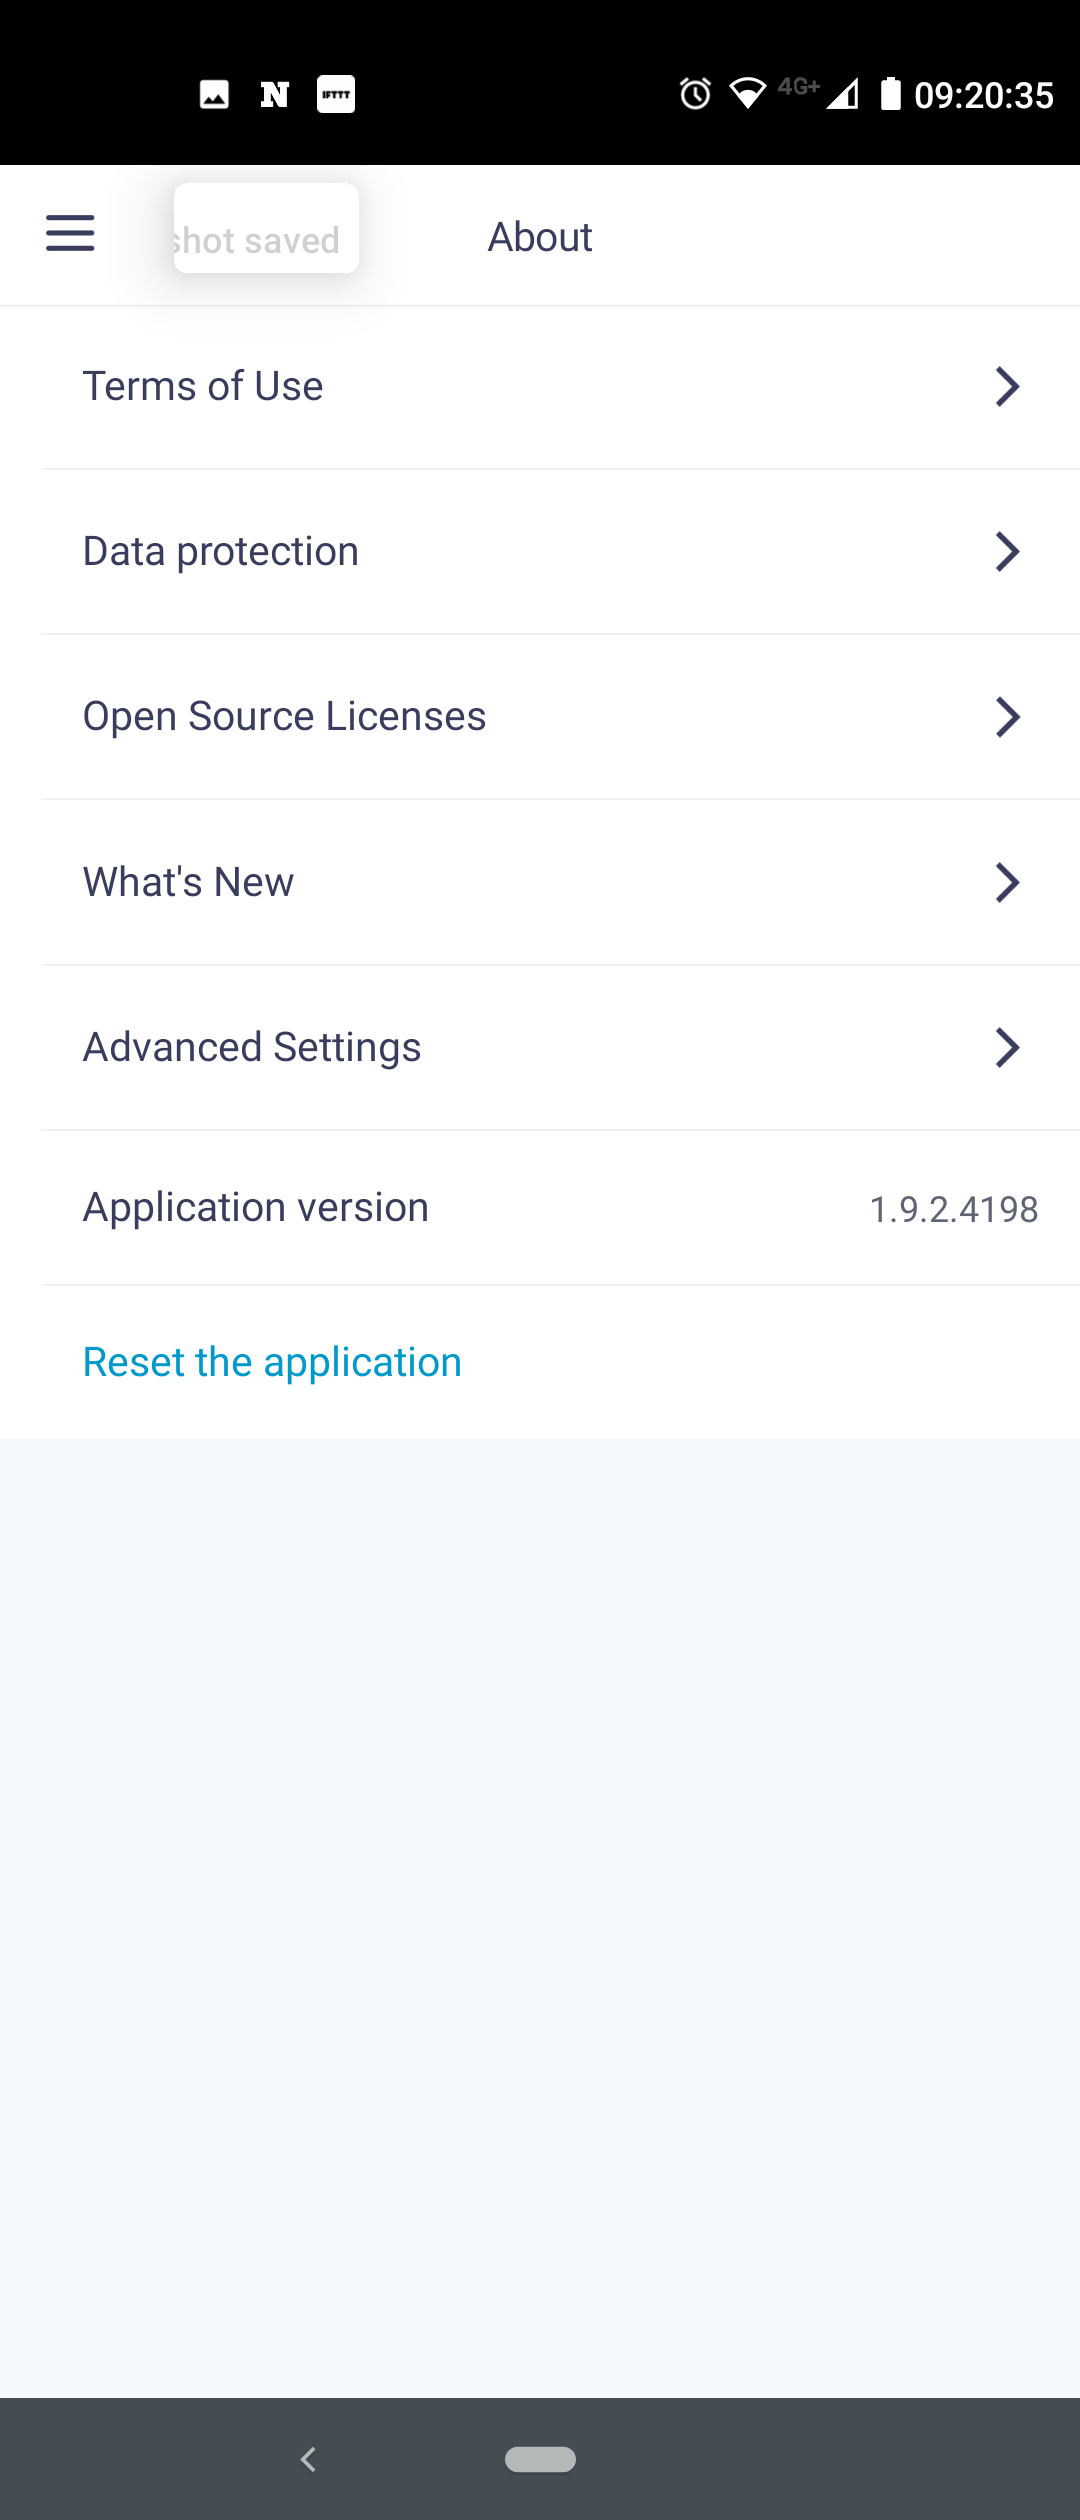
2. Select "About". Note that starting from Madoka Assistant version 1.10, "Advanced Settings" will be available under "App Settings" instead of under "About".
3. Select "Advanced Settings".

4. Toggle on the "Advanced Settings". A warning message appears.
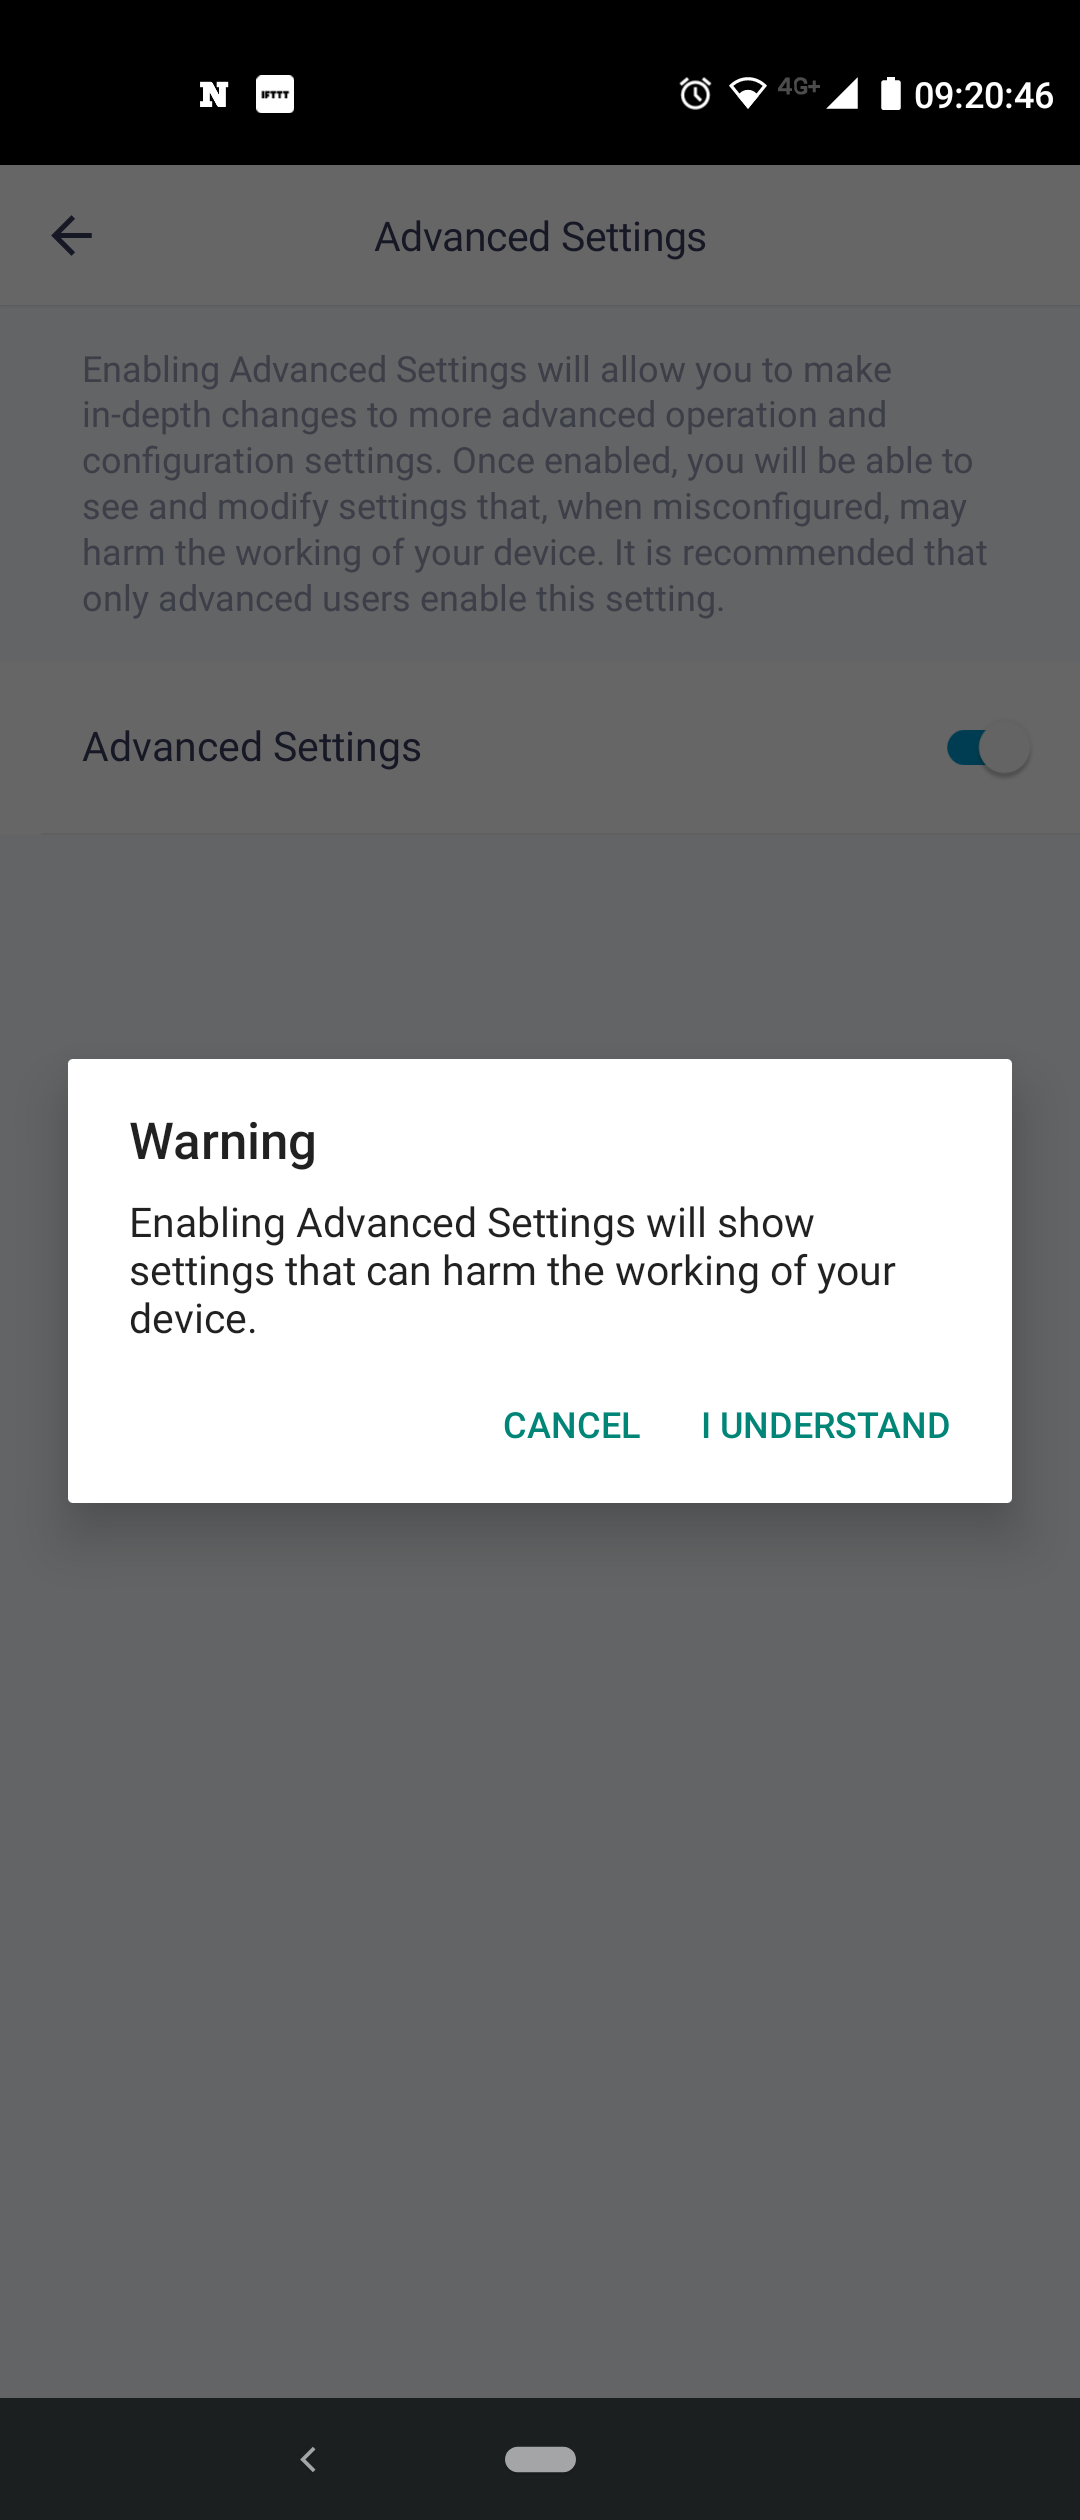
5. Press "I understand". Advanced Mode is now enabled.
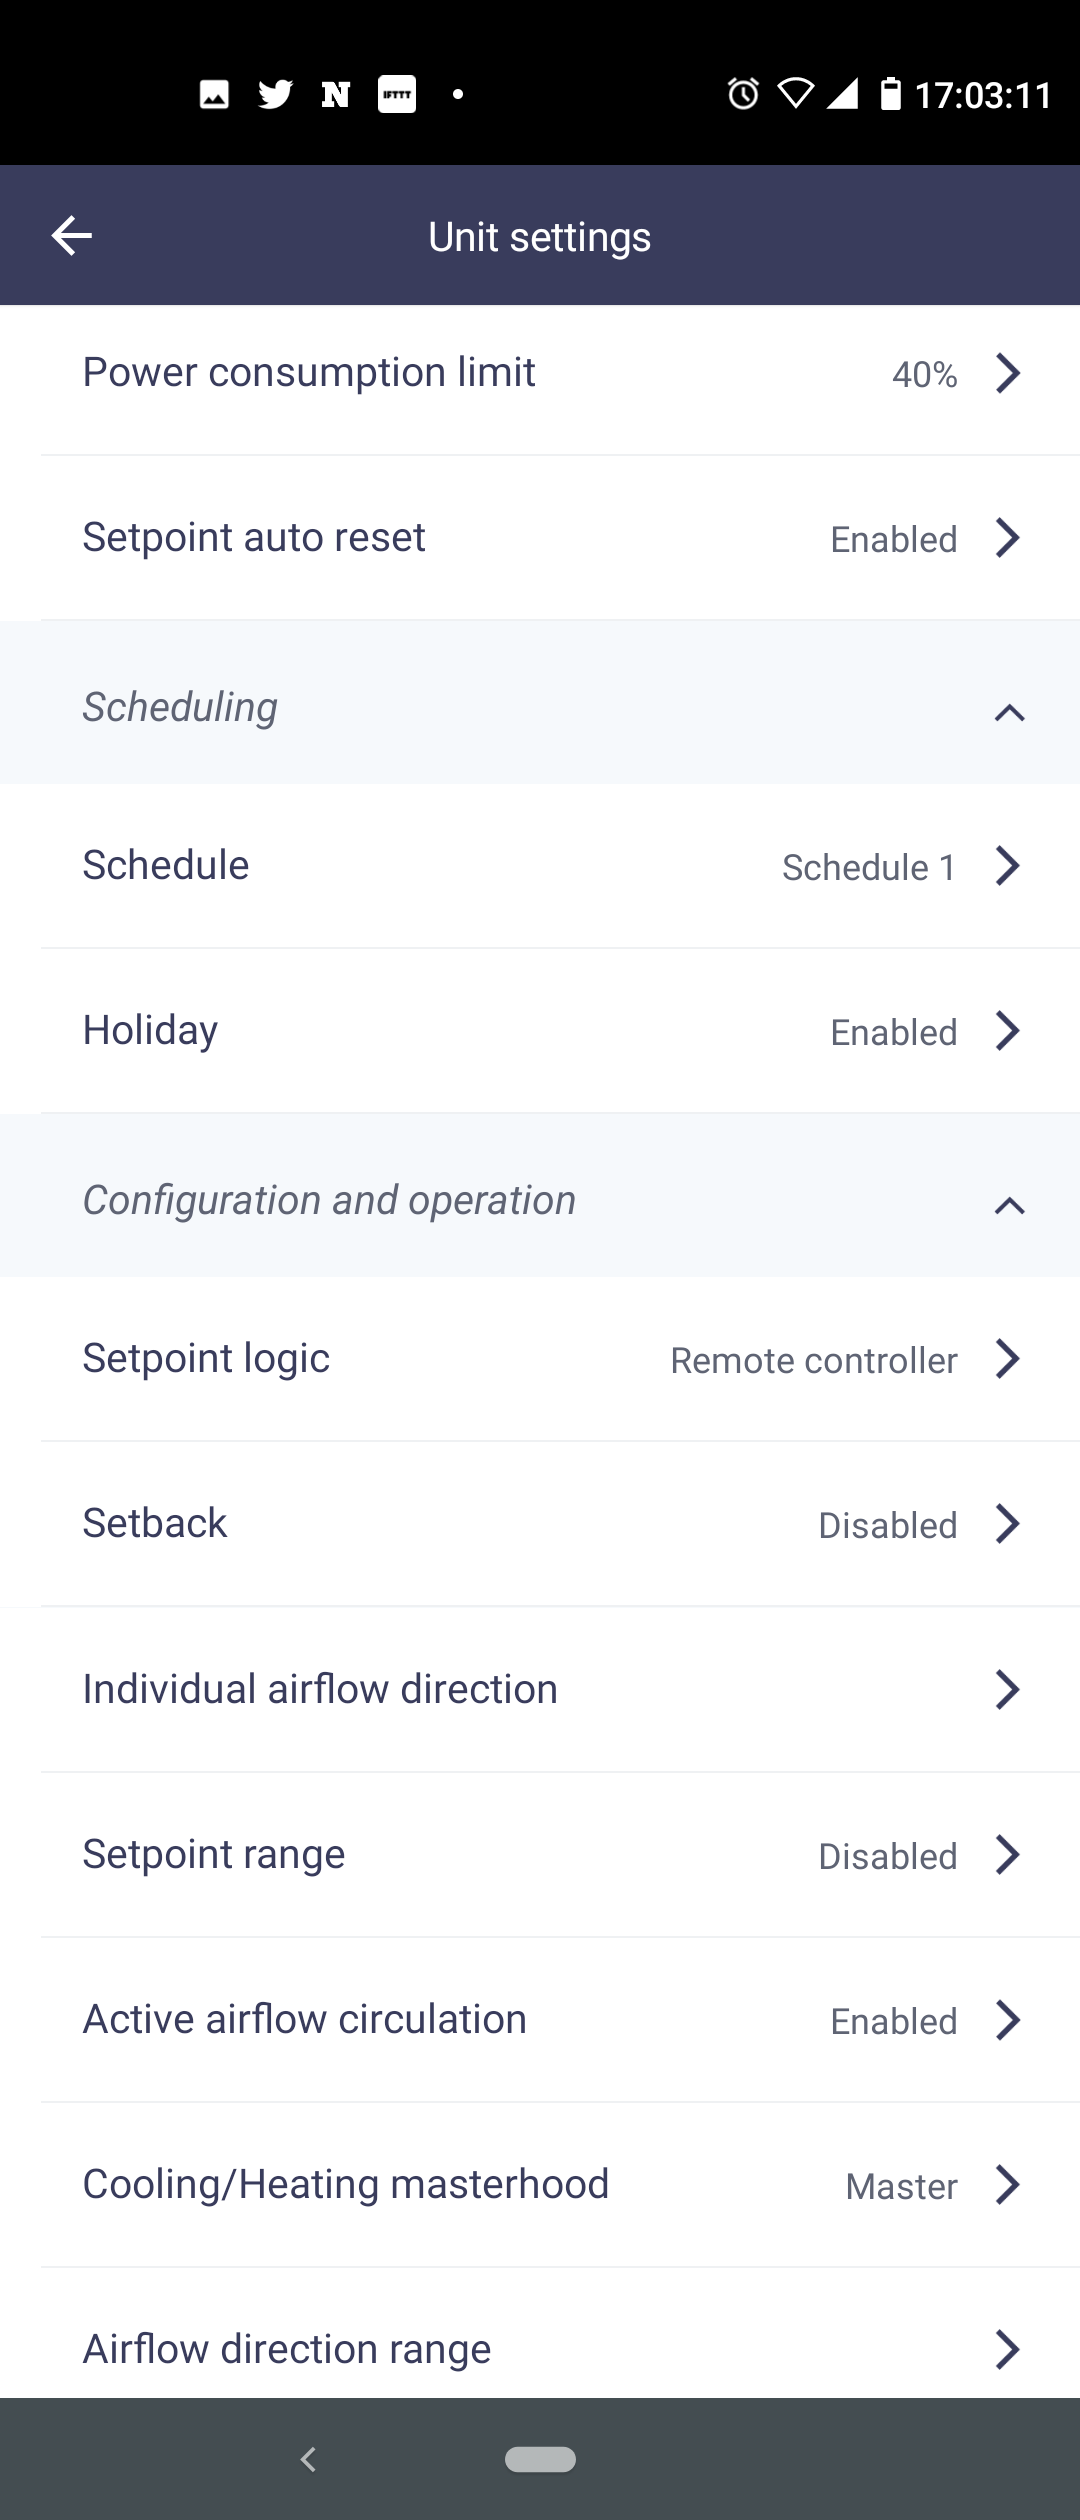
3. Go to "Unit settings".

4. Select "Setpoint logic".

5. Select the "indoor unit" option and press "Apply".
In order to synchronize the room temperature between the Daikin Residential Controller app and the Sky Air wired remote controller, configure the field settings for the wired remote controller either using the Madoka Assistant app or directly on the wired remote controller. See the steps below for more information.
Configuring the field settings using the Madoka Assistant app
1. Open the latest version of the Madoka Assistant app.
2. Enable Advanced Settings:
1. Go to the main menu.
2. Select "About".

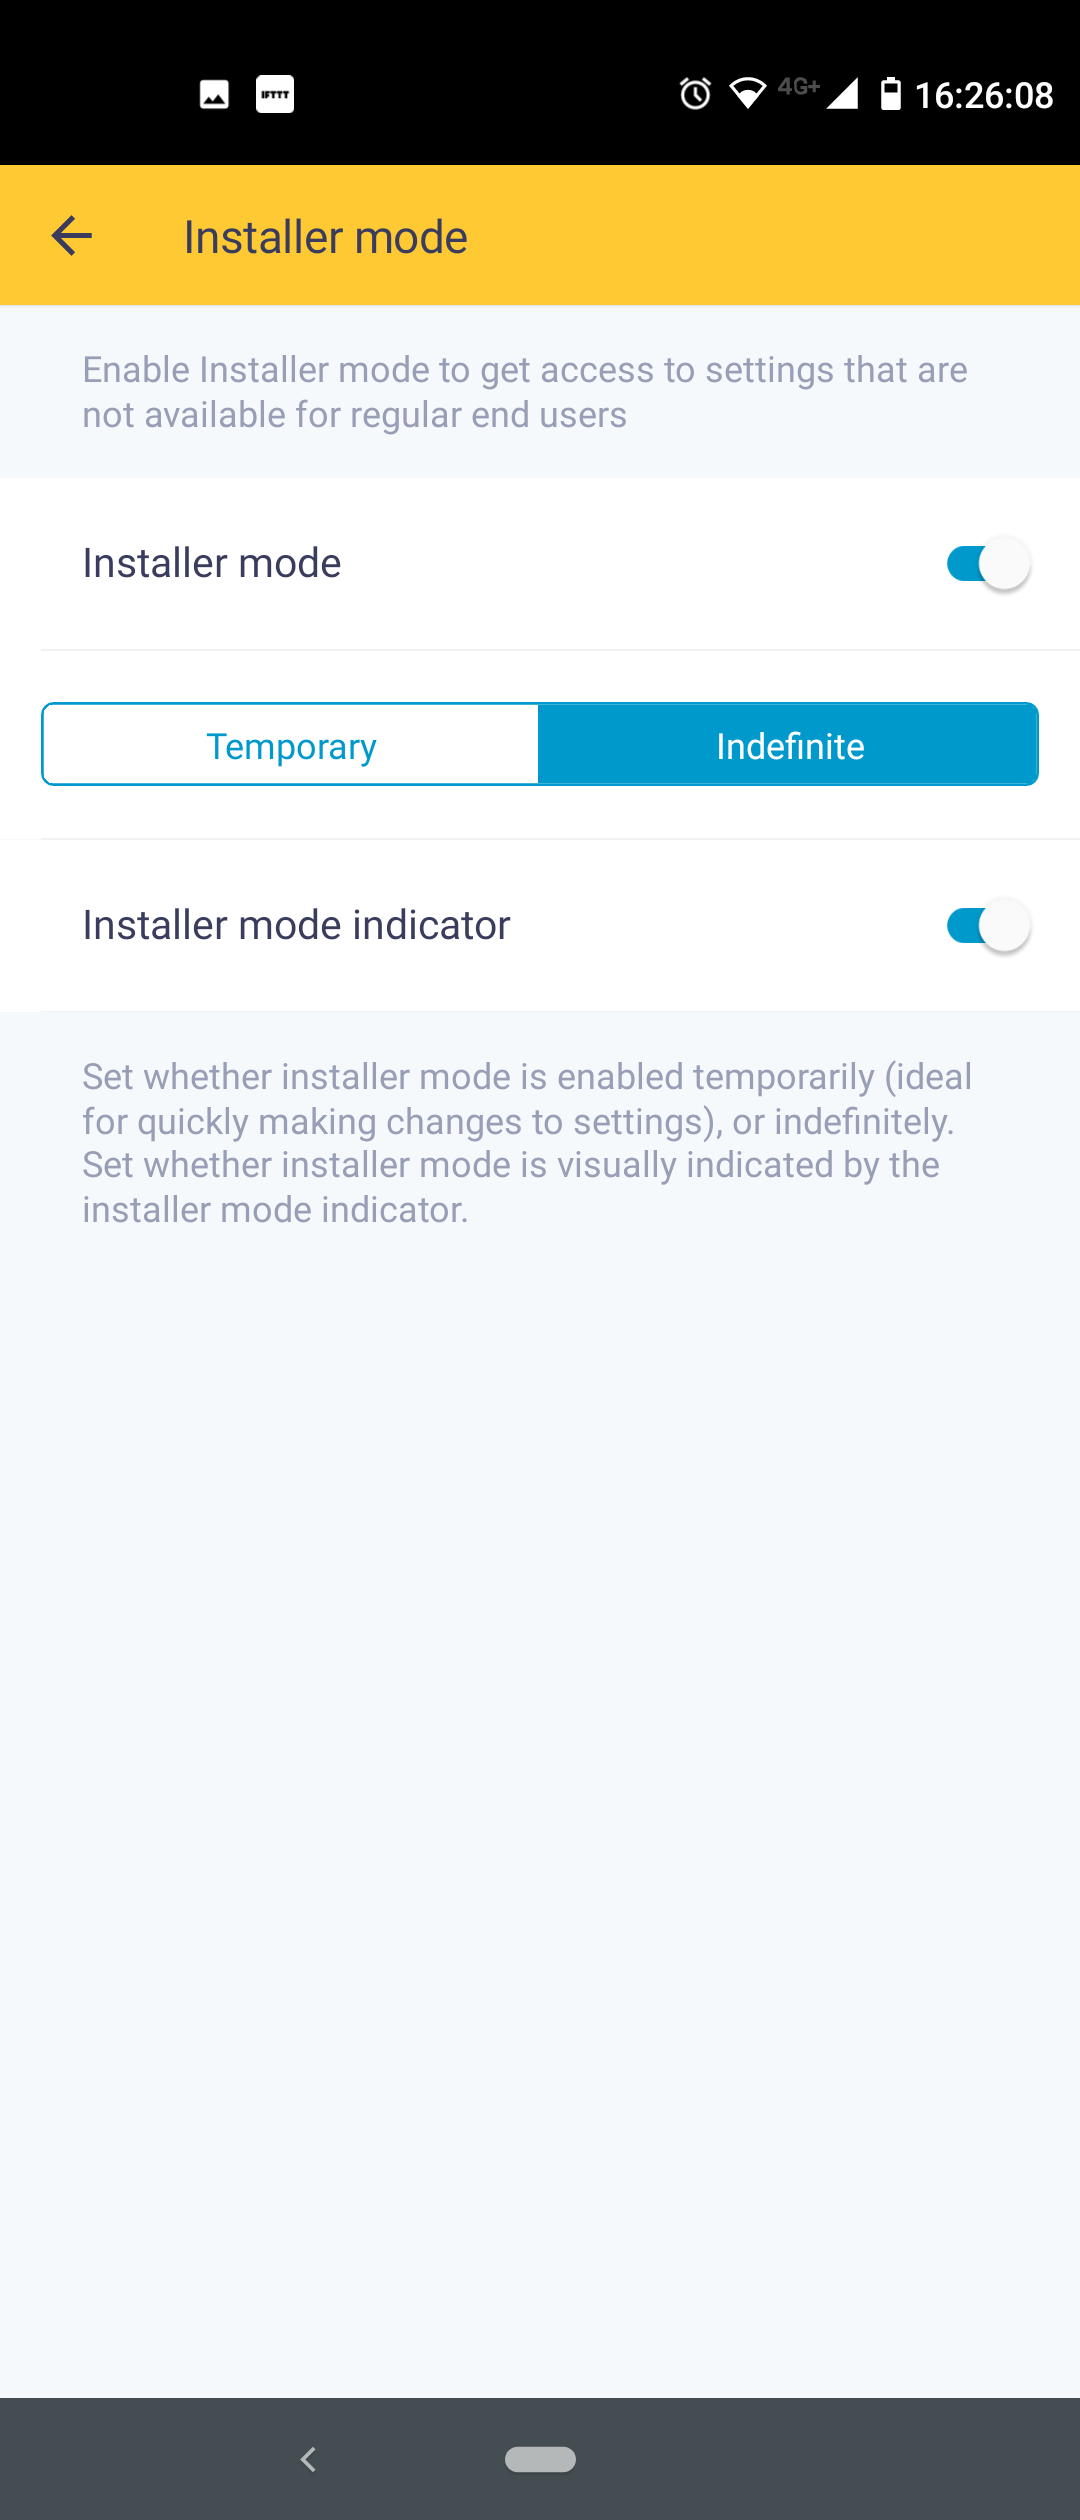
3. Tap "Application version" 5 times to enable installer mode.
4. Set the installer mode to "Temporary".
5. Return to home screen and select the remote controller.
6. Go to "Unit settings" from the settings menu.
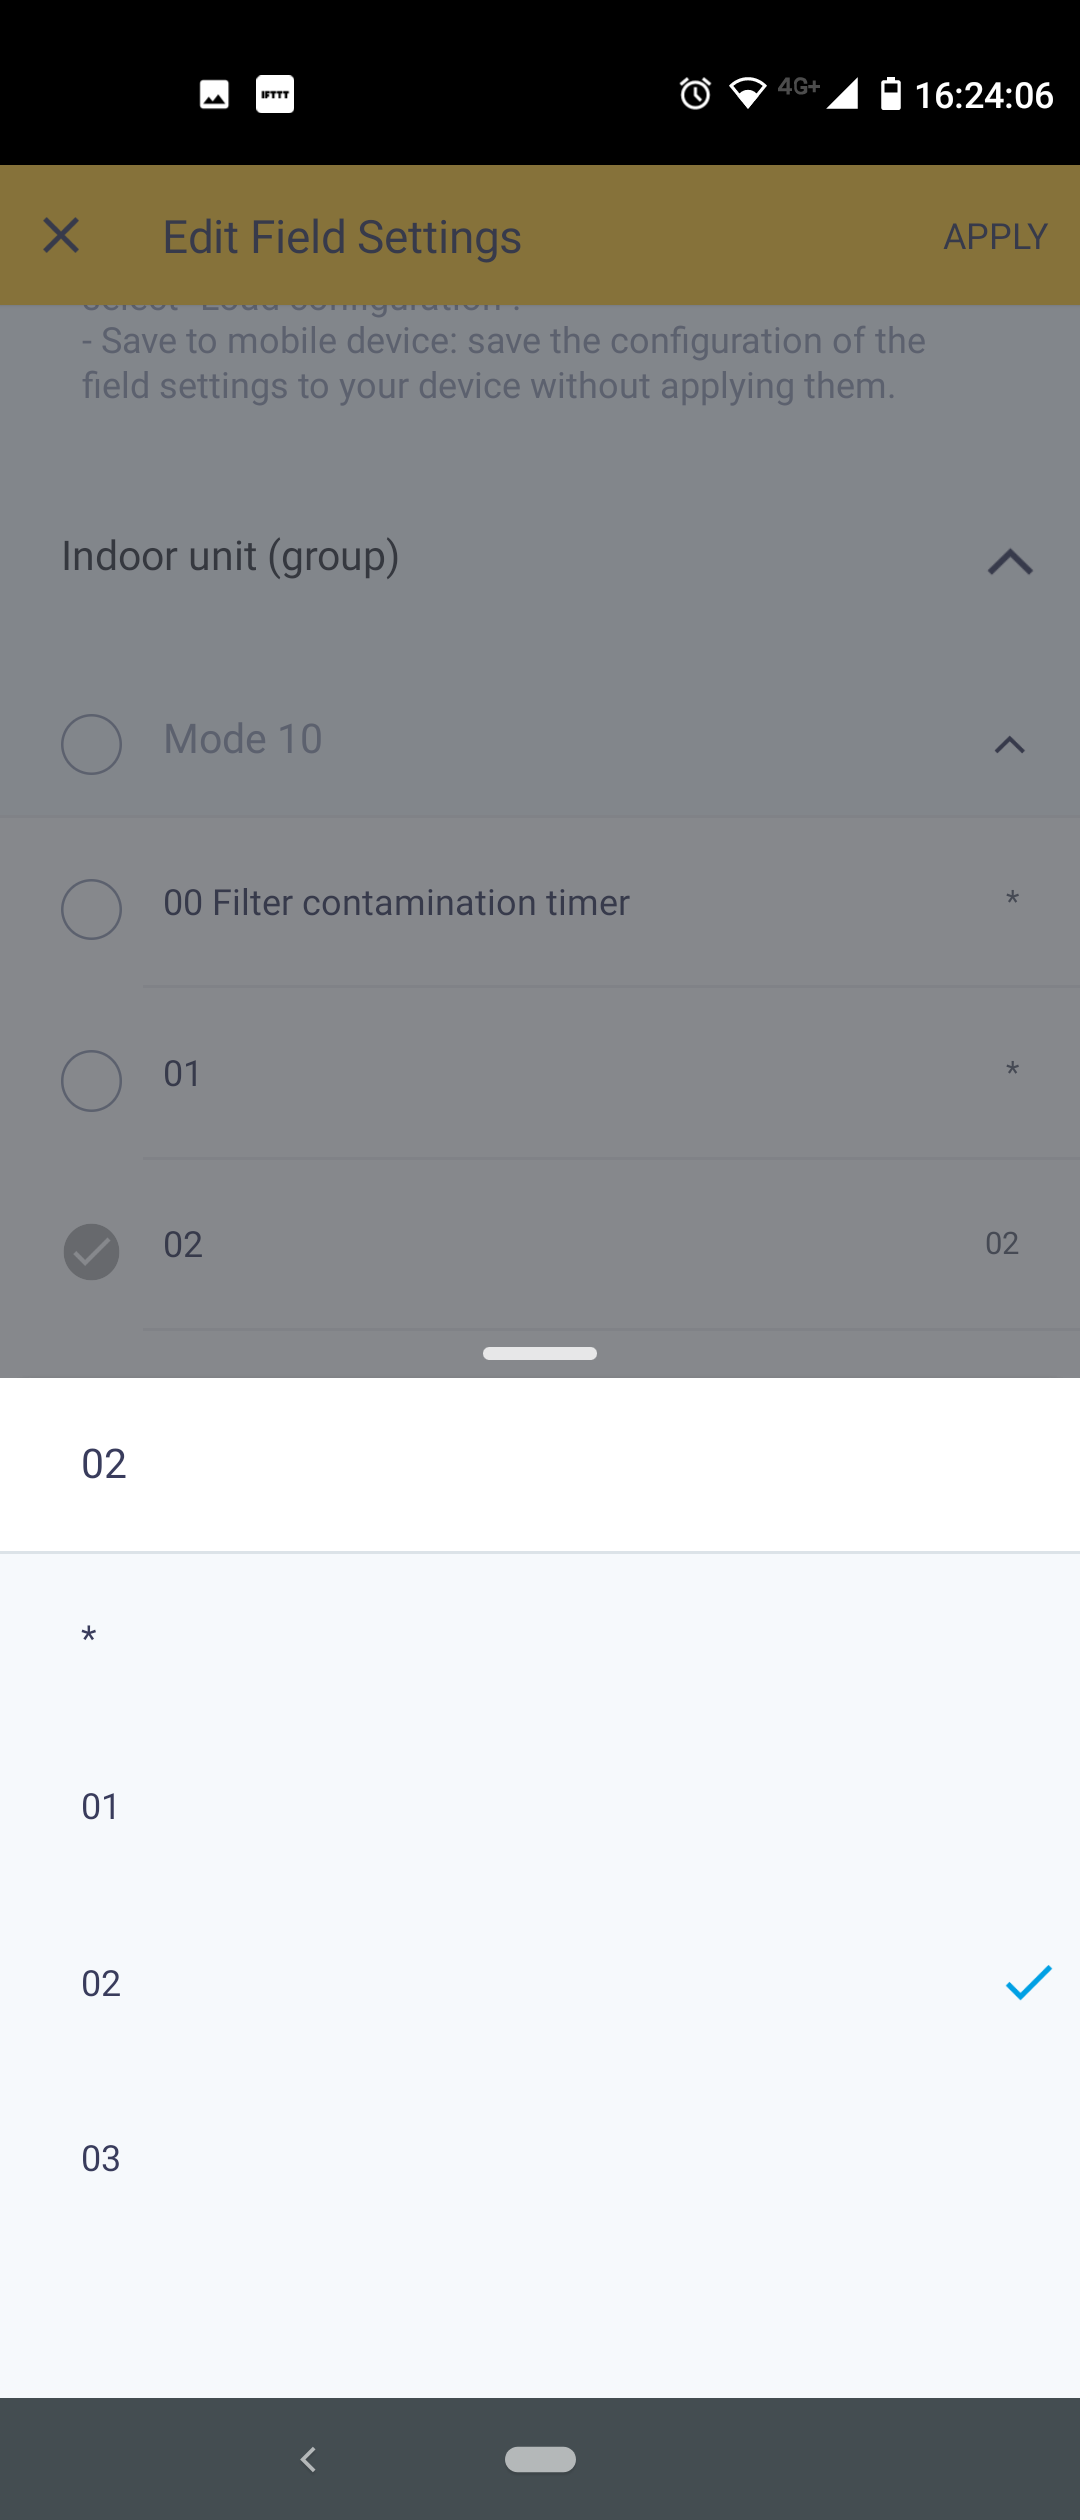
7. Go to "Field Settings".

8. Select item 02 under "Mode 10" and set the value to 02.
9. Select item "01 Thermostat sensor" under "Mode 1c" and set the value to "01 - Indoor unit thermistor".

10. In the top right corner, tap "Apply". Confirm by tapping "Apply" again in the confirmation pop-up.

11. Select "Apply to remote controller".

12. Verify that the remote controller is restarting. The new settings are applied once the remote controller has restarted.

Configuring the field settings on the wired remote controller
Note that you do not have to configure the field settings on the wired remote controller if you have already configured them using the Madoka Assistant app (see above).
1. Press the middle button (circle) and keep it pressed until the information screen appears
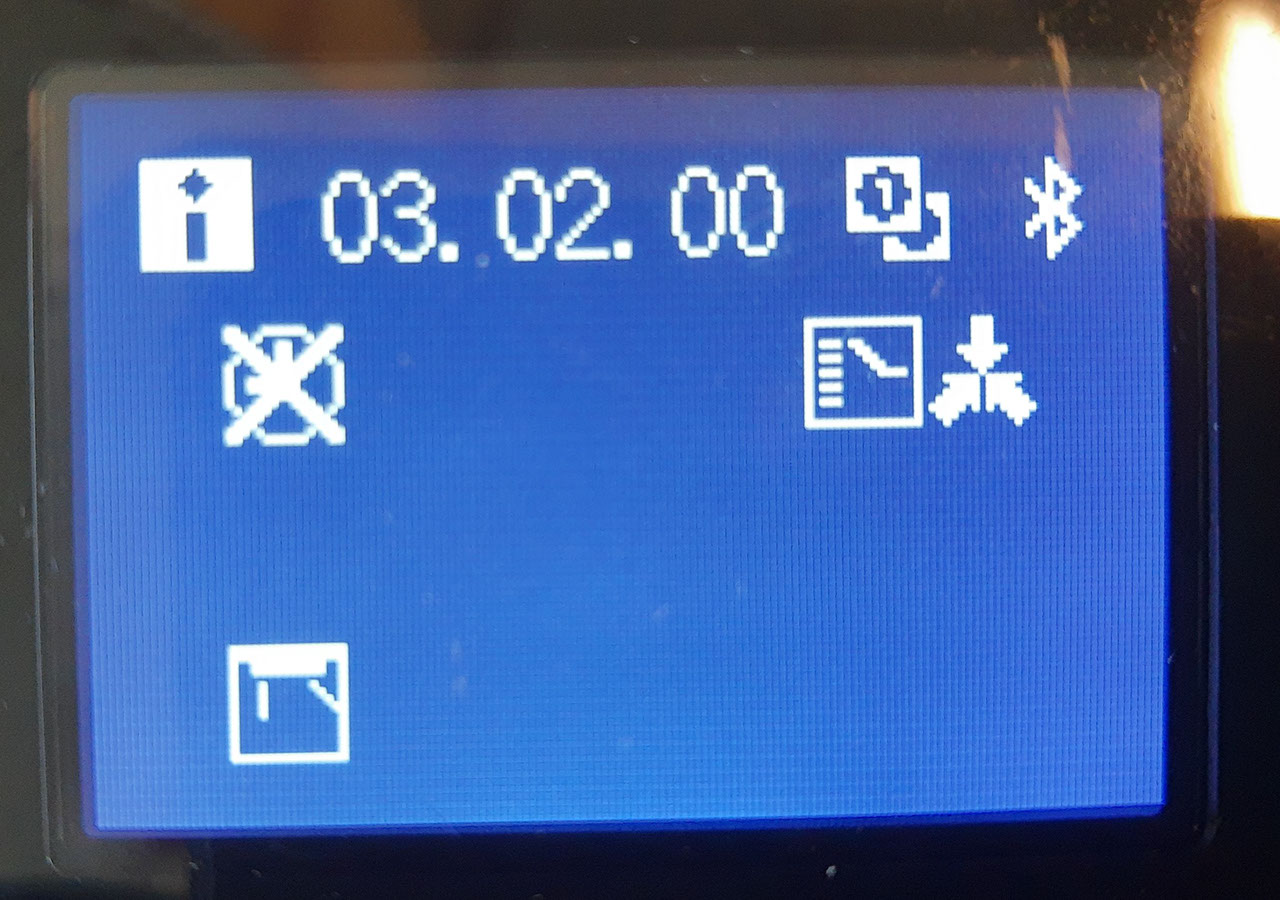
2. Press the left button (minus) and the middle button (circle) simultaneously and keep them pressed until you enter the installer menu.
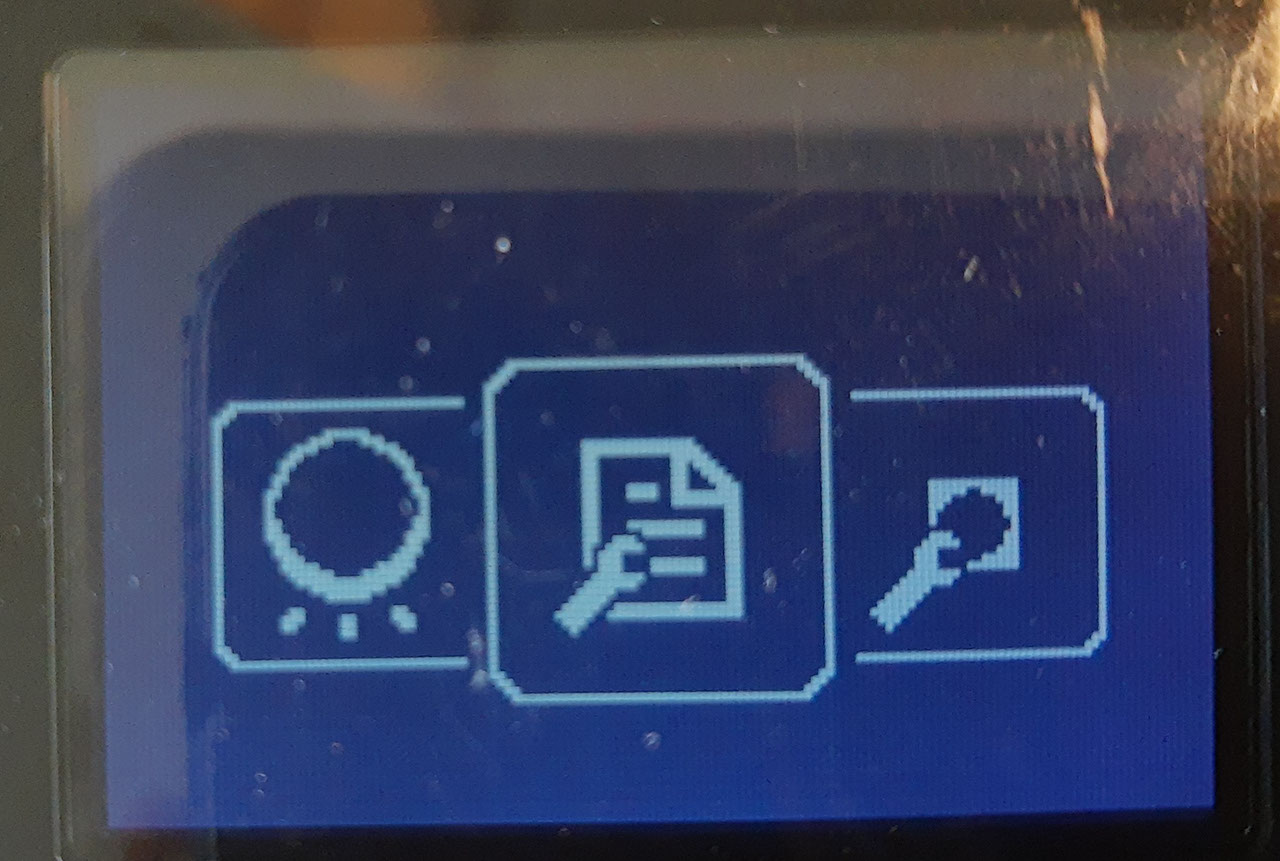
3. Navigate to the field settings menu for the indoor unit. The menu icon shows a document with a wrench in front of it.
4. Select Mode 10 and confirm your selection.

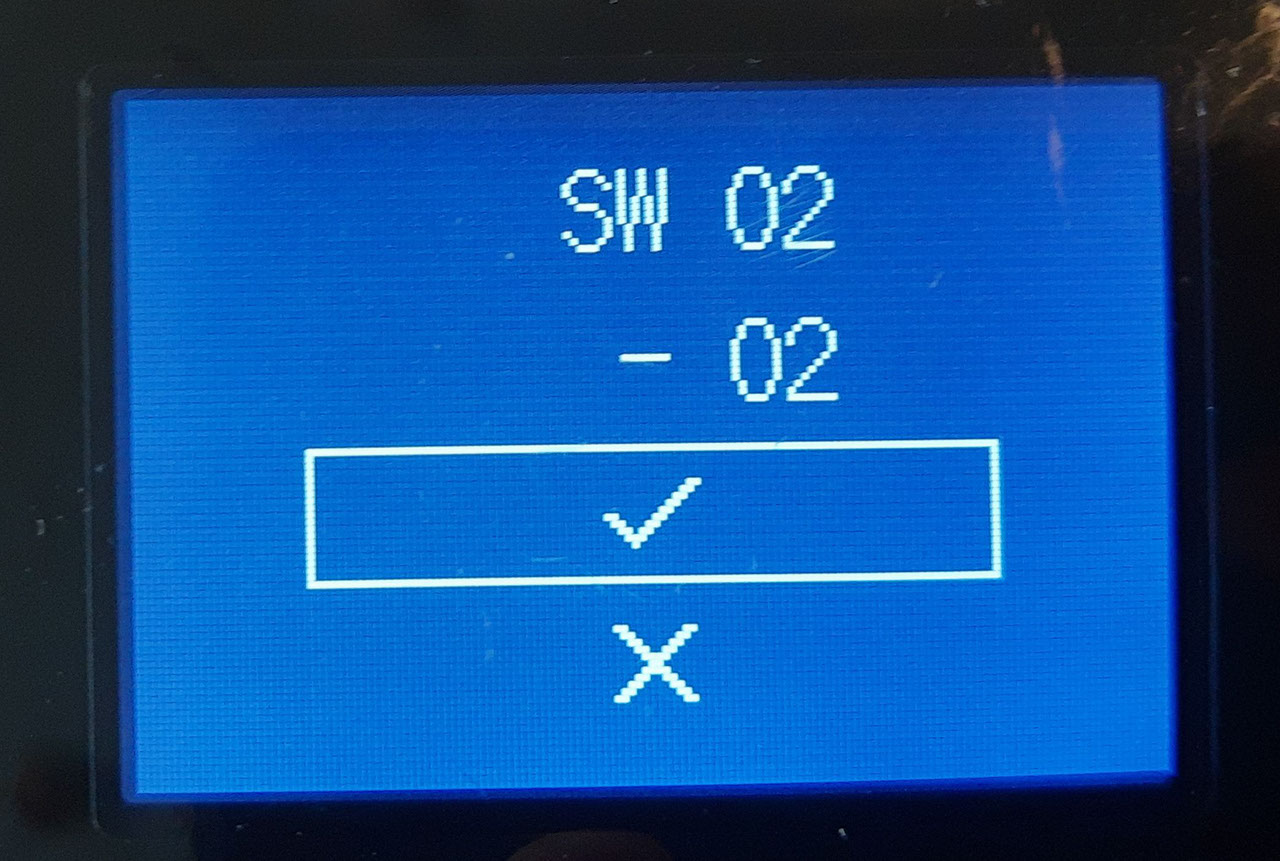
5. Change the setting (SW) to 02 and set the value to 02.

6. Confirm your selection.
7. Select Mode 1c and confirm your selection.

8. Change the setting (SW) to 01 and set the value to 01. Confirm your selection.

9. In the field settings menu, select "X" to return to the previous menu.

10. In the installer menu, navigate to and select the arrow icon to restart the wired remote controller and apply the new settings.